provider etiketine sahip kayıtlar gösteriliyor. Tüm kayıtları göster

Simple ToDo Application with Provider


Hello,
Today I would like to talk about and illustrate a structure that I found very difficult, complex and took a lot of time to understand during my Flutter learning process. Our topic is the Provider structure in Flutter. I have previously talked about the “State” logic in Flutter, the differences between stateful and stateless widgets. I leave a reminder link below:

Flutter and Widget Concept

We use Stateful Widgets if there will be changes in the application as a result of user interaction or for other reasons. That is, at points that should contain a State object. And with very simple logic, if there is a “State” in the middle, it needs to be managed, that is, we need to choose and use one of the State Management methods so that we can track the state of the State and instantly show the changing interface to the user as a result of interaction. I want to talk about the Provider structure, which is one of these methods. Let’s start if we are ready.

What is Provider ?

Provider is a package used for state management in Flutter, and is used to manage and share state in specific regions or across the application. Provider provides a simple and efficient way to recreate, update and share state.

The encyclopaedic information I used above can be found everywhere. I will show how to use it with a short and simple todo application.

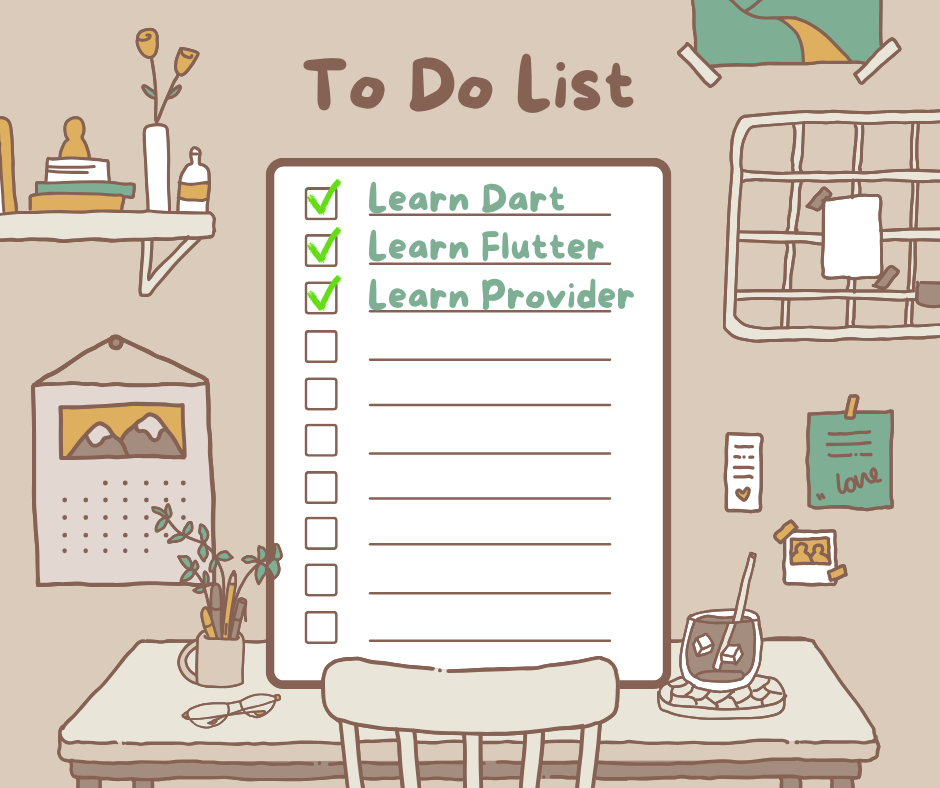
When our project is completed, it will look like the following:

Basic ToDoApp with Provider

Step 1:

First, we create and name a new Flutter application. After the project is created, we open the pubspec.yaml file and add the Provider package here.

dependencies:
flutter:
sdk: flutter
provider: ^6.0.0 //The version number may change
//according to the date you created the application.

Step 2:

The second step is to create a model representing the state. Since our application is TodoApp, we can create a Todo class:

class Todo {
//We will check the todo items with checkbox.
String title;
bool isDone;

Todo({
required this.title,
this.isDone = false, //checkbox will initially come unchecked
});

void toggleDone() {
isDone = !isDone; //method to add tick if there is no tick
//when checkbox is clicked and delete if there is tick
}
}

Step 3:

In the next stage, we need to create a class that manages State and extend it with “ChangeNotifier”. ChangeNotifier is a class that listens and notifies state changes. By calling the notifyListeners() method of this class, we notify this change to all components (widgets) that listen for changes. If we go from our example, let’s say the user wanted to cross out an item he added to the Todo list and ticked the checkbox, thanks to this class, the change is notified to the user interface instantly and the checkbox tick appears and the item is crossed out.

class TodoProvider with ChangeNotifier {
List<Todo> _todos = [];

List<Todo> get todos => _todos;

void addTodo(String title) { //Method to add from CRUD operations
_todos.add(Todo(title: title));
notifyListeners(); //method that allows changes to be reflected
//to the interface instantly
}

void toggleTodoStatus(int index) {
_todos[index].toggleDone();
notifyListeners();
}
}

Step 4:

In this step, we integrate the Provider structure into our main.dart file. ChangeNotifierProvider creates an instance of the ChangeNotifier class (we can think of it as getting an instance) and declares State to subcomponents.

void main() {
runApp(
ChangeNotifierProvider(
create: (context) => TodoProvider(),
child: MyApp(),
),
);
}

class MyApp extends StatelessWidget {
@override
Widget build(BuildContext context) {
return MaterialApp(
home: TodoListScreen(),
);
}
}

Step 5:

Finally, we create another file called todoListScreen.dart and redirect the MaterialApp’s home page to it.

class TodoListScreen extends StatelessWidget {
final TextEditingController _controller = TextEditingController();

@override
Widget build(BuildContext context) {
return Scaffold(
appBar: AppBar(
title: Text('To-Do List'),
),
body: Column(
children: [
Padding(
padding: const EdgeInsets.all(16.0),
child: Row(
children: [
Expanded(
child: TextField(
controller: _controller,
decoration: InputDecoration(labelText: 'New To-Do'),
),
),
IconButton(
icon: Icon(Icons.add),
onPressed: () {
if (_controller.text.isNotEmpty) {
Provider.of<TodoProvider>(context, listen: false)
.addTodo(_controller.text);
_controller.clear();
}
},
),
],
),
),
Expanded(
child: Consumer<TodoProvider>(
builder: (context, todoProvider, child) {
return ListView.builder(
itemCount: todoProvider.todos.length,
itemBuilder: (context, index) {
final todo = todoProvider.todos[index];
return ListTile(
title: Text(
todo.title,
style: TextStyle(
decoration: todo.isDone
? TextDecoration.lineThrough
: TextDecoration.none,
),
),
trailing: Checkbox(
value: todo.isDone,
onChanged: (value) {
todoProvider.toggleTodoStatus(index);
},
),
);
},
);
},
),
),
],
),
);
}
}

There are two uses I need to explain here. The first one is Consumer.

Expanded widget with Consumer is the place where todo items will be displayed. Here, the Consumer allows us to display the todo items right below when the user adds an item. Because Consumer listens to the provider (TodoProvider) using the builder method and automatically rebuilds the widget when the state changes.

The second use is the Provider.of<T>(context) construct. This method accesses the provider of the specified type, which in our example is TodoProvider. Here we have a method called addTodo and using this method new todo items can be added to the list. Here we want to access only the state without listening to the state change, so we give the listen parameter as false. If we give true, it also listens to these changes, but it may cause performance problems because it is unnecessary here.

Finally, we have experienced state management by combining the simple To-Do List application with the Provider structure. We can further develop this project, add persistent data storage or more advanced user interface features.

I tried to explain the Provider structure in a very short and simple way. I hope it was useful.

Good coding to all of us.

Selin.

Provider ile Basit ToDo Uygulaması


Merhaba,

Bugün sizlere Flutter öğrenme sürecimde beni epey zorlayan, karmaşık bulduğum ve anlamak için oldukça fazla zaman ayırdığım bir yapıdan bahsetmek ve bunu örneklemek istiyorum. Konumuz Flutter’da Provider yapısı. Daha önce Flutter’da “State” mantığından, stateful ve stateless widget’ların farklılıklarından söz etmiştim. Aşağıya hatırlatma linki bırakıyorum:

Flutter ve Widget Kavramı

Stateful Widget’ları uygulamada kullanıcı etkileşimi sonucu veya başka sebeplerle değişiklik olacaksa kullanıyoruz. Yani State nesnesi içermesi gereken noktalarda. Ve çok basit mantıkla eğer ortada bir “State” var ise, bunun yönetilmesi gerekir yani State Management yöntemlerinden birini seçmemi ve kullanmamız gerekir ki State’in durumunu takip edebilelim ve etkileşim sonucu değişen arayüzü kullanıcıya anlık olarak gösterebilelim. Ben size bu yöntemlerden biri olan Provider yapısından bahsetmek istiyorum. Hazırsak başlayalım.

Provider Nedir?

Provider, Flutter’da state management için kullanılan bir paket olup, uygulamanın belirli bölgelerinde veya genelinde durumu (state) yönetmek ve bu durumu paylaşmak için kullanılır. Provider, durumun yeniden oluşturulması, güncellenmesi ve paylaşılması konusunda basit ve etkili bir yol sunar.

Yukarıda kullandığım ansiklopedik bir bilgi, her yerde bulunabilir. Ben kısa ve basit bir todo uygulaması ile açıklamalı olarak bunun nasıl kullanılacağını göstereceğim.

Projemiz tamamlandığında aşağıdaki gibi görünecek:

Provider ile Basit ToDoApp

1. Adım:

İlk olarak yeni bir Flutter uygulaması oluşturup isimlendiriyoruz. Proje oluştuktan sonra pubspec.yaml dosyasını açarak buraya Provider paketini ekliyoruz.

dependencies:
flutter:
sdk: flutter
provider: ^6.0.0 //versiyon numarası
//sizin uygulamayı oluşturduğunuz
//tarihe göre değişebilir.

2. Adım:

İkinci adım olarak durumu (state) temsil eden bir model oluşturuyoruz. Uygulamamız TodoApp olduğu için bir Todo sınıfı oluşturabiliriz:

class Todo {
//todo maddelerini checkbox ile kontrol edeceğiz.
String title;
bool isDone;

Todo({
required this.title,
this.isDone = false, //checkbox başlangıçta işaretlenmemiş olarak gelecek
});

void toggleDone() {
isDone = !isDone; //checkbox tıklandığında tick yok ise eklenmesini,
//var ise silinmesini sağlayan metod
}
}

3. Adım:

Bir sonraki aşamada State’i yöneten bir sınıf oluşturmamız gerekiyor ve “ChangeNotifier” ile genişletiyoruz. ChangeNotifier, durum değişikliklerini dinleyen ve bildiren bir sınıftır. Bu sınıfa ait notifyListeners() isimli metodunu çağırarak d,a değişiklikleri dinleyen tüm bileşenlere (widget'lara) bu değişikliği bildirmiş oluyoruz. Örneğimizden gidecek olursak, kullanıcı Todo listesine eklediği bir maddenin üzerini çizmek istedi ve checkbox’ı işaretledi diyelim, bu sınıf sayesinde kullanıcı arayüzüne değişiklik anında bildiriliyor ve checkbox tick’i beliriyor ve maddenin üzeri çiziliyor.


class TodoProvider with ChangeNotifier {
List<Todo> _todos = [];

List<Todo> get todos => _todos;

void addTodo(String title) { //CRUD işlemlerinden eklemeyi sağlayan metot
_todos.add(Todo(title: title));
notifyListeners(); //değişikliklerin anlık olarak arayüze yansıtılmasını
//sağlayan metot
}

void toggleTodoStatus(int index) {
_todos[index].toggleDone();
notifyListeners();
}
}

4. Adım:

Bu adımda main.dart dosyamıza Provider yapısını entegre ediyoruz. ChangeNotifierProvider, ChangeNotifier sınıfının bir örneğini oluşturuyor (instance almak gibi düşünebiliriz) ve alt bileşenlere State bildirimi yapıyor.

void main() {
runApp(
ChangeNotifierProvider(
create: (context) => TodoProvider(),
child: MyApp(),
),
);
}

class MyApp extends StatelessWidget {
@override
Widget build(BuildContext context) {
return MaterialApp(
home: TodoListScreen(),
);
}
}

5. Adım:

Son olarak todoListScreen.dart adında bir dosya daha oluşturuyoruz ve MaterialApp’in home sayfasını buna yönlendiriyoruz.

class TodoListScreen extends StatelessWidget {
final TextEditingController _controller = TextEditingController();

@override
Widget build(BuildContext context) {
return Scaffold(
appBar: AppBar(
title: Text('To-Do List'),
),
body: Column(
children: [
Padding(
padding: const EdgeInsets.all(16.0),
child: Row(
children: [
Expanded(
child: TextField(
controller: _controller,
decoration: InputDecoration(labelText: 'New To-Do'),
),
),
IconButton(
icon: Icon(Icons.add),
onPressed: () {
if (_controller.text.isNotEmpty) {
Provider.of<TodoProvider>(context, listen: false)
.addTodo(_controller.text);
_controller.clear();
}
},
),
],
),
),
Expanded(
child: Consumer<TodoProvider>(
builder: (context, todoProvider, child) {
return ListView.builder(
itemCount: todoProvider.todos.length,
itemBuilder: (context, index) {
final todo = todoProvider.todos[index];
return ListTile(
title: Text(
todo.title,
style: TextStyle(
decoration: todo.isDone
? TextDecoration.lineThrough
: TextDecoration.none,
),
),
trailing: Checkbox(
value: todo.isDone,
onChanged: (value) {
todoProvider.toggleTodoStatus(index);
},
),
);
},
);
},
),
),
],
),
);
}
}

Burada açıklamam gereken iki kullanım var. Birincisi Consumer.

Consumer’ın yer aldığı Expanded widget’ı todo maddelerinin görüntüleneceği yeri oluşturuyor. Burada Consumer bize kullanıcı bir madde eklediğinde hemen altında görüntülenmesini sağlıyor. Çünkü Consumer, builder metodunu kullanarak, sağlayıcıyı (TodoProvider) dinliyor ve durum değiştiğinde otomatik olarak widget'ı yeniden oluşturuyor.

İkinci kullanım ise Provider.of<T>(context) yapısı. Bu metod belirtilen türdeki provider’a ulaşıyor, ki bu bizim örneğimizde TodoProvider. Burada addTodo isimli bir metodumuz var ve bu metodu kullanarak listeye yeni todo maddeleri eklenebiliyor. Burada durum değişikliğini dinlemeden sadece duruma erişmek istediğimizden listen parametresini false olarak veriyoruz. true verirsek bu değişiklikleri de dinler ancak burada gereksiz olduğundan performans sorunlarına yol açabilir.

Son olarak, basit To-Do Listesi uygulaması ile Provider yapısını birleştirerek state management (durum yönetimi) konusunu deneyimlemiş olduk. Bu projeyi daha da geliştirebilir, kalıcı veri depolama veya daha gelişmiş kullanıcı arayüzü özellikleri ekleyebiliriz.

Provider yapısını oldukça kısa ve basit şekliyle anlatmaya çalıştım. Umarım faydası olmuştur.

Hepimize iyi kodlamalar.

Selin.