 |
| Unity and Joystick Control |
Hello,
In this article, I will tell you how to control the game with Joystick with Unity. Users prefer to play their games on mobile devices as well as computers and consoles and similar platforms, and writing games that will work on mobile is very popular today. We can use the advantage of the touch screen by adding a joystick to our game screen and make our game preferable.
So how to add Joystick to unity game project? How to control the joystick? How to move a character or object using a joystick? I will explain all of them step by step in my article.
I will start by assuming that you have already created a Unity project and added a character or an object that you want to move with a plane and a joystick to the game scene.
Adding Joystick
Step 1 : Add Collider and Rigidbody to the character we created.
Step 2 : Let’s add the Joystick package offered for free to our project from the link below.
Step 3: After downloading and importing our package using Package Manager, let’s add a Canvas to our project. It doesn’t matter if our project is 2D or 3D, it works in both cases. Because we need a Canvas object to place the joystick on the screen.
Step 4: Then drag and drop the Fixed Joystick from the prefabs folder in the package folders under the Canvas we created in the previous step. Since we have selected the prefab whose position is Fixed by default, the joystick will be placed in the lower left corner of the screen.
Step 5: Since we prefer to use our game on the mobile platform and with the screen tilted, let’s open the Build Settings screen, after adding the scene to the build screen, select IOS or Android and click Switch Platform.
On the Main Screen, where the Scene and Game windows are, Smilator should now be displayed instead of Game.
Step 6: In this step, let’s move on to screen sizing. Let’s change the Scaler property in the Inspector section of the Canvas we added to Scale With Screen Size. Here we can enter the screen sizes we are targeting.
Joystick Control
Step 7: After adjusting the screen sizes, it’s time for the coding part that will allow us to move our character or object. We can add the following codes to the Script file we will create in our Script folder.
 [SerializeField] private FixedJoystick _joystick;
    [SerializeField] private float _moveSpeed;

    private void FixedUpdate()
    {
        JoystickMovement();
    }

    void JoystickMovement()
    {
        float horizontal = _joystick.Horizontal;
        float vertical = _joystick.Vertical;
        Vector3 addedPosition = new Vector3(horizontal * _moveSpeed * Time.deltaTime, 0, vertical * _moveSpeed * Time.deltaTime);
        transform.position += addedPosition;
    }
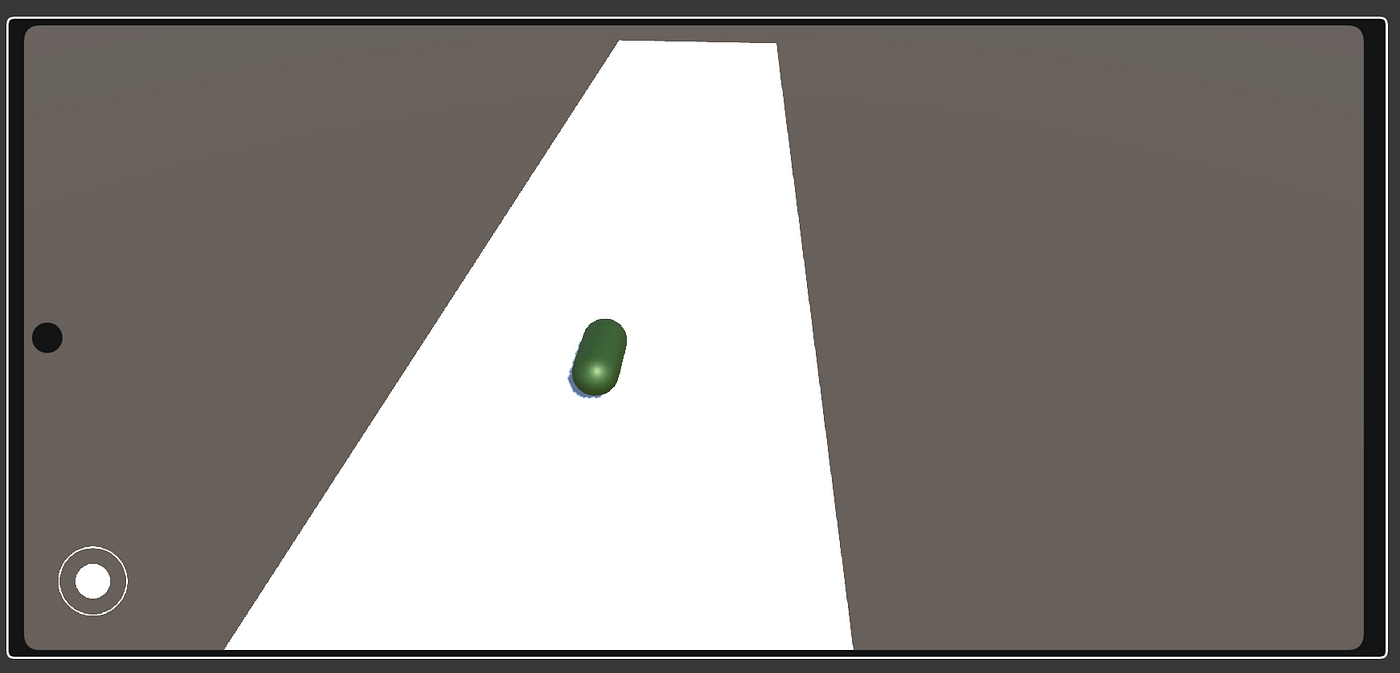
I added a flat floor and a capsule as above for an example. We can think of it as a character. I especially tilted the capsule sideways by playing with its rotation because it already has a rigid body, so it automatically falls to the side as soon as we start the game.
Step 8: Let’s add the Script we wrote above to our character. Let’s not forget to assign our joystick that we added from the package folders to the _joystick variable, which we define as private here but make it accessible with the SerialiseField expression.
I tried to explain step by step how to add a joystick to a game in Unity and how to control it, I hope it was useful.
Thanks for your reading.
Selin.
Hiç yorum yok:
Yorum Gönder